![[New] Piecing Together an Epic TikTok Conclusion for 2024](https://thmb.techidaily.com/704c497d76ce3443a342fa34e8883ce74ed2e3eea338695faa58de9221c96a80.jpg)
[New] Piecing Together an Epic TikTok Conclusion for 2024
Piecing Together an Epic TikTok Conclusion
If you’re just getting started on TikTok, you might be wondering why people bother with TikTok outros. After all, they’re just a few seconds of a clip at the end of your videos. Why not just let the video end and move on?
Well, TikTok outros are actually a really important part of the platform. They’re a great way to promote your other social media platforms, give your viewers a call to action, or just show off your personality.
In this article, we’ll show you how to create an outro for TikTok that is sure to leave an ever-lasting impression on those watching your content. In the end, we’ll recommend the best video editors that you can use to make your videos engaging by creating the perfect outros every time.
Part 1. Basic Things You Should Know About the Outro in a Video
The outro is the last section of the video where the credits are displayed, such as the name of the creator, the date the video was created, and any other relevant information.
An outro is a good chance to thank your viewers for watching, promote your other videos or social channels, and maybe even sneak in a call-to-action.
Basically, the outro is the last thing your viewers will see, so it’s important to make it count!

Elements of an Outro
Here are a few basic elements to include in your outro to keep people engaged:
- Subscription: Make it easy for people to subscribe to your TikTok account so they can automatically get new content as soon as it’s released. Include a call-to-action at the end of each video, telling people how they can subscribe and get the latest content.
- The Next Video to Watch: If you have other episodes/parts of your TikTok videos, let people know what to expect next. This will give them a reason to come back for more.
- Your Social Media Channels: Let people know where they can find you on other social media platforms so they can connect with you outside of TikTok. This is a great way to build relationships with your viewers.
- Use Stunning Visuals: Usually, viewers skip outros just like any movie credits showing on a black screen with names on it. However, if you try to create a short TikTok outro with stunning visuals, impressive background sound, and a bit of flair, you are bound to get more followers.
How To Make an Advanced Good Outro?
If you want your TikTok video to go viral, you are required to have a good outro, meaning that you need to have a format that is consistent with the main body of your video, a length that is appropriate, and a call to action that is effective.
To create a good outro for your TikTok, follow the below tips:
- Make sure that your outro is in the same format as the rest of your TikTok video. This means that if your TikTok is mainly conversation, your outro should be as well.
- Keep your outro short and sweet because you don’t want to bore your listeners with a long one. The ideal outro duration should not be more than 15 to 20 seconds.
- Your outro should include a call to action. This could be something like asking your listeners to subscribe to your TikTok, follow, and share your content.
- Make your outros visually appealing and make use of colors and/or patterns that are pleasing to the eye.
- Add positive words and phrases to your outros to have a good impact on your viewers.
- Use branding elements like your logo or channel name.
Part 2. An Excellent Video Editor for Your TikTok Adventure
While popular culture and many influencers might have you believe that TikTok is all about kids lip-syncing to pop songs, there’s so much more to this social media platform. Recently, it has become a powerful marketing tool for small to mid-sized businesses.
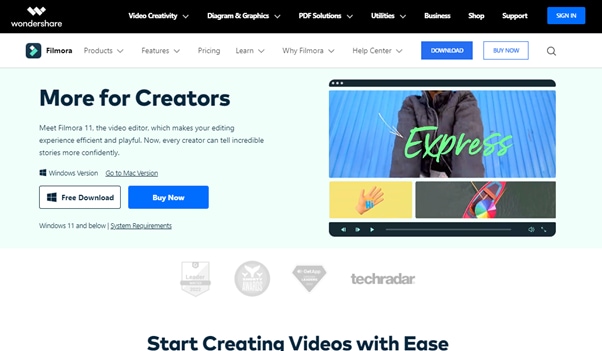
The best way to use TikTok’s platform for marketing is to create engaging outros for your videos. For this, you’ll need video editing software like Filmora and a little creative mind. With this program, you can easily add text, music, and effects to your TikTok clips to make them truly stand out.
Below are some features of Filmora software:
- Built-in music library.
- Easy to use even for novice users.
- Numerous effects and a color tuning tool.
- Noise removal and an audio equalizer.
- 4k video editing support
- Audio mixer and video stabilization.
- Speed ramping and GIF support.
Follow the instructions below to create some great outros for your TikTok account using the Filmora software:
Step1 First, launch a browser on your PC, visit the official Wondershare Filmora website and download the software version for your Mac or Windows operating system.
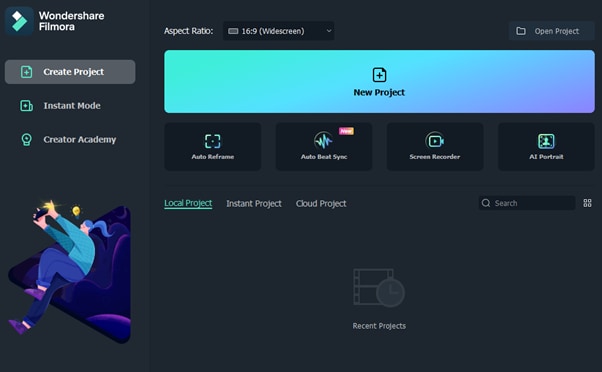
Step2 Install the software on your PC, launch it, click the New Project option on the main dashboard, and use the “Click here to import Media” option or drag and drop your file to import it.
Step3 Drag your video and drop it in the Timeline to start the editing process. Now, add photos, effects, titles, and music to your TikTok outro clip in the end. You can also apply transitions between your video clips.
Step4 Review your video and make the necessary outro adjustments in the Timeline. Finally, click the “Export” option and save the video on your mobile device and upload it on TikTok afterward.
Part 3. A Bonus Recommendation: TikTok Outro Online Makers
Although Filmora is one of the best desktop video editors to create TikTok outros on your Windows or Mac computer, there are several other great online editors to make a quick outro without hiring a costly video production service.
To know more about these editors, read Best 10 TikTok Video Editors to Make a TikTok Video [Online/Windows/PC] .

Conclusion
To become a TikTok sensation overnight, you need to create videos that stand out from the rest. You can achieve this by having compelling intros and outros.
In this article, we’ve provided a detailed guide on how to create an outro for TikTok using Filmora software. We’ve also explained what a good outro is and its basic elements to help you understand the process well.
So, all you need is a strong editing app, a creative mind, and user-friendly software to add an outro to your TikTok videos that will make them even more engaging and entertaining.
Free Download For Win 7 or later(64-bit)
Free Download For macOS 10.14 or later
Below are some features of Filmora software:
- Built-in music library.
- Easy to use even for novice users.
- Numerous effects and a color tuning tool.
- Noise removal and an audio equalizer.
- 4k video editing support
- Audio mixer and video stabilization.
- Speed ramping and GIF support.
Follow the instructions below to create some great outros for your TikTok account using the Filmora software:
Step1 First, launch a browser on your PC, visit the official Wondershare Filmora website and download the software version for your Mac or Windows operating system.
Step2 Install the software on your PC, launch it, click the New Project option on the main dashboard, and use the “Click here to import Media” option or drag and drop your file to import it.
Step3 Drag your video and drop it in the Timeline to start the editing process. Now, add photos, effects, titles, and music to your TikTok outro clip in the end. You can also apply transitions between your video clips.
Step4 Review your video and make the necessary outro adjustments in the Timeline. Finally, click the “Export” option and save the video on your mobile device and upload it on TikTok afterward.
Part 3. A Bonus Recommendation: TikTok Outro Online Makers
Although Filmora is one of the best desktop video editors to create TikTok outros on your Windows or Mac computer, there are several other great online editors to make a quick outro without hiring a costly video production service.
To know more about these editors, read Best 10 TikTok Video Editors to Make a TikTok Video [Online/Windows/PC] .
Conclusion
To become a TikTok sensation overnight, you need to create videos that stand out from the rest. You can achieve this by having compelling intros and outros.
In this article, we’ve provided a detailed guide on how to create an outro for TikTok using Filmora software. We’ve also explained what a good outro is and its basic elements to help you understand the process well.
So, all you need is a strong editing app, a creative mind, and user-friendly software to add an outro to your TikTok videos that will make them even more engaging and entertaining.
Free Download For Win 7 or later(64-bit)
Free Download For macOS 10.14 or later
The Filmmaker’s Formula for Unbeatable TikTok Reaction Content Using Filmora
How to Make TikTok Reaction Videos Easily in 2 Ways

Shanoon Cox
Mar 27, 2024• Proven solutions
With all the videos of different moods and categories available on the platform, TikTok’s reaction is something that makes the footage more engaging. Available for both iOS and Android platforms, TikTok allows you to record, edit , and compile a video of up to 60 seconds, and apply a plethora of filters and animation effects to them along with adding relevant music to awe your audience.
Considering this, here you will learn how to make TikTok reaction videos with ease from within the app itself, and if that’s not enough, using one of the best and most efficient programs available in the market that can even allow you to add unique effects to the reactions you create.
- Part 1: How to Make React Videos on TikTok
- Part 2: How to Use Snap Filmora to Make TikTok Reaction Videos
Bonus: Create A More Attractive Video with Human Segmentation Effect
The human segmentation effect under AI Portrait allows you to isolate people from video background even without a green screen, and then you can composite it to make a reaction video easily. Watch the video tutorial below to find out more details.


Want to read the texts instead of watching videos? Check the complete guide to making a reaction video in 3 ways .
Part 1: How to React to a TikTok Video
After being equipped with all the worldly knowledge about TikTok reaction videos, you can follow the steps given below to learn how to react to the footage created by other people:
1. Tap Share and Record Your Reaction
Start TikTok, play the video you want to react on, tap the Share icon from the lower-right area, and tap the React option from the Share to menu. Tap Flip from the top-right corner of the Camera screen to switch between the front and rear camera as needed, optionally tap the Mic icon to disable or enable voice and system audio capture, drag and reposition React window according to the source footage, and tap the Record button from the bottom to start shooting your TikTok reaction. Wait while the source clip and your recording process are complete successfully before moving forward to the next step.

2. Apply Filters
Tap the Filters icon from the top-right corner, tap to pick a filter from those available at the bottom, and tap anywhere on the screen to accept the one you selected and to get back to the previous window.

3. Manage Audio
Tap the Mixer icon from the upper-right corner of the screen, drag the My Voice and Soundtrack Volume sliders to manage your voice recording and the internal audio respectively, and tap Done to save the changes once you’re through with the modifications. Back on the previous window, tap Next from the bottom-right corner.

4. Publish the Video
Tap the Who can view this video option to manage your reaction’s visibility settings (optional). Tap the Save to device toggle switch to prevent TikTok reaction from being stored on your mobile’s storage (optional). Next, tap the Post button from the bottom-right corner to publish the video to TikTok.

More creative tricks about TikTok video: Clone Yourself in TikTok
Part 2: How to Make Reaction Videos with Filmora
Even though you can make TikTok reaction videos using its own filters and audio mixing tools that work pretty well under ideal conditions, if you are a perfectionist and like precision in anything you do or create, you need a dedicated program that has been designed specifically for the purpose.
Although several such tools are available in the market and can be easily downloaded and used, the best among them is Filmora by Wondershare. Wondershare Filmora is an industry-standard production and post-production tool for both Mac and Windows PCs that the majority of users prefer over its competitors such as Adobe Premiere Pro, Final Cut Pro X, etc. This is because Filmora offers simple UI, is less resource-intensive, and is able to render the outputs significantly faster.
You can learn how to make TikTok reaction videos using Wondershare Filmora by following the steps given below:
Note: Before proceeding, make sure that you have already copied the source (and the reaction) video(s) from your smartphone to your computer.
1. Create New Project and Set Preferences
Start Wondershare Filmora on your Windows or Mac PC, go to File > New Project and click 9:16 (Portrait) from the submenu that appears.
Click Split Screen from the standard toolbar at the top, hover mouse to the screen type preset you want to use, click the + ( Add to Project ) icon that appears at the bottom-right corner of the thumbnail, and click OK from the bottom-right corner once the preset is added to the Timeline.

2. Import and Add Video(s) Preview/Timeline
Click the Media button from the standard toolbar, click anywhere inside the Media window at the upper-left corner, and when the Open box comes up, select and import the video file(s) you want to participate in the TikTok reaction. Alternatively, you can also click Record from below the standard toolbar, and choose any of the options to record your own video or voice right from within Wondershare Filmora itself.
Next, click and drag each of the imported videos to their corresponding screen sections in the Preview window in the upper-right area. Notice how the files are automatically added to the Timeline at the bottom.
3. Add Elements and Titles
Click Elements from the standard toolbar, hover mouse to the element you want to add to the reaction, click the + icon that appears at the center of the thumbnail, and reposition the element in the Timeline to match the duration with that of the reaction you are creating.

4. Export the Reaction

Click EXPORT from the top-middle section of the interface, go to the Local tab from the top of the Export box that appears next, select your preferred format from the left bar, optionally choose a destination folder from the right window, optionally click SETTINGS to fine-tune the output preferences as needed, and click EXPORT from the bottom-right corner to export the TikTok reaction. Or, you can save it in the settings perfect for iPhone or another device.
Below is a sample reaction video made with Filmora, you can do much better than that for your TikTok account:
Besides using Filmora to edit reaction videos with the split-screen presets, you can also use some other video editing software to create a reaction video . Filmora can empower your video creation with more creativity, watch the video below and download Filmora to try.
Conclusion
A TikTok reaction enables you to make the source videos more fun and entertaining. Luckily the app itself has a “React” button that helps you create TikTok reaction videos with merely a few simple taps. However, if you feel that the built-in options are not as robust as they should be, a third-party program like Wondershare Filmora is something you would definitely love to try your hands on as the software is not only easy to use, it is also lightweight, and doesn’t put any overhead on your computer hardware.
Shanoon Cox
Shanoon Cox is a writer and a lover of all things video.
Follow @Shanoon Cox
Shanoon Cox
Mar 27, 2024• Proven solutions
With all the videos of different moods and categories available on the platform, TikTok’s reaction is something that makes the footage more engaging. Available for both iOS and Android platforms, TikTok allows you to record, edit , and compile a video of up to 60 seconds, and apply a plethora of filters and animation effects to them along with adding relevant music to awe your audience.
Considering this, here you will learn how to make TikTok reaction videos with ease from within the app itself, and if that’s not enough, using one of the best and most efficient programs available in the market that can even allow you to add unique effects to the reactions you create.
- Part 1: How to Make React Videos on TikTok
- Part 2: How to Use Snap Filmora to Make TikTok Reaction Videos
Bonus: Create A More Attractive Video with Human Segmentation Effect
The human segmentation effect under AI Portrait allows you to isolate people from video background even without a green screen, and then you can composite it to make a reaction video easily. Watch the video tutorial below to find out more details.
Want to read the texts instead of watching videos? Check the complete guide to making a reaction video in 3 ways .
Part 1: How to React to a TikTok Video
After being equipped with all the worldly knowledge about TikTok reaction videos, you can follow the steps given below to learn how to react to the footage created by other people:
1. Tap Share and Record Your Reaction
Start TikTok, play the video you want to react on, tap the Share icon from the lower-right area, and tap the React option from the Share to menu. Tap Flip from the top-right corner of the Camera screen to switch between the front and rear camera as needed, optionally tap the Mic icon to disable or enable voice and system audio capture, drag and reposition React window according to the source footage, and tap the Record button from the bottom to start shooting your TikTok reaction. Wait while the source clip and your recording process are complete successfully before moving forward to the next step.
2. Apply Filters
Tap the Filters icon from the top-right corner, tap to pick a filter from those available at the bottom, and tap anywhere on the screen to accept the one you selected and to get back to the previous window.
3. Manage Audio
Tap the Mixer icon from the upper-right corner of the screen, drag the My Voice and Soundtrack Volume sliders to manage your voice recording and the internal audio respectively, and tap Done to save the changes once you’re through with the modifications. Back on the previous window, tap Next from the bottom-right corner.
4. Publish the Video
Tap the Who can view this video option to manage your reaction’s visibility settings (optional). Tap the Save to device toggle switch to prevent TikTok reaction from being stored on your mobile’s storage (optional). Next, tap the Post button from the bottom-right corner to publish the video to TikTok.
More creative tricks about TikTok video: Clone Yourself in TikTok
Part 2: How to Make Reaction Videos with Filmora
Even though you can make TikTok reaction videos using its own filters and audio mixing tools that work pretty well under ideal conditions, if you are a perfectionist and like precision in anything you do or create, you need a dedicated program that has been designed specifically for the purpose.
Although several such tools are available in the market and can be easily downloaded and used, the best among them is Filmora by Wondershare. Wondershare Filmora is an industry-standard production and post-production tool for both Mac and Windows PCs that the majority of users prefer over its competitors such as Adobe Premiere Pro, Final Cut Pro X, etc. This is because Filmora offers simple UI, is less resource-intensive, and is able to render the outputs significantly faster.
You can learn how to make TikTok reaction videos using Wondershare Filmora by following the steps given below:
Note: Before proceeding, make sure that you have already copied the source (and the reaction) video(s) from your smartphone to your computer.
1. Create New Project and Set Preferences
Start Wondershare Filmora on your Windows or Mac PC, go to File > New Project and click 9:16 (Portrait) from the submenu that appears.
Click Split Screen from the standard toolbar at the top, hover mouse to the screen type preset you want to use, click the + ( Add to Project ) icon that appears at the bottom-right corner of the thumbnail, and click OK from the bottom-right corner once the preset is added to the Timeline.
2. Import and Add Video(s) Preview/Timeline
Click the Media button from the standard toolbar, click anywhere inside the Media window at the upper-left corner, and when the Open box comes up, select and import the video file(s) you want to participate in the TikTok reaction. Alternatively, you can also click Record from below the standard toolbar, and choose any of the options to record your own video or voice right from within Wondershare Filmora itself.
Next, click and drag each of the imported videos to their corresponding screen sections in the Preview window in the upper-right area. Notice how the files are automatically added to the Timeline at the bottom.
3. Add Elements and Titles
Click Elements from the standard toolbar, hover mouse to the element you want to add to the reaction, click the + icon that appears at the center of the thumbnail, and reposition the element in the Timeline to match the duration with that of the reaction you are creating.
4. Export the Reaction
Click EXPORT from the top-middle section of the interface, go to the Local tab from the top of the Export box that appears next, select your preferred format from the left bar, optionally choose a destination folder from the right window, optionally click SETTINGS to fine-tune the output preferences as needed, and click EXPORT from the bottom-right corner to export the TikTok reaction. Or, you can save it in the settings perfect for iPhone or another device.
Below is a sample reaction video made with Filmora, you can do much better than that for your TikTok account:
Besides using Filmora to edit reaction videos with the split-screen presets, you can also use some other video editing software to create a reaction video . Filmora can empower your video creation with more creativity, watch the video below and download Filmora to try.
Conclusion
A TikTok reaction enables you to make the source videos more fun and entertaining. Luckily the app itself has a “React” button that helps you create TikTok reaction videos with merely a few simple taps. However, if you feel that the built-in options are not as robust as they should be, a third-party program like Wondershare Filmora is something you would definitely love to try your hands on as the software is not only easy to use, it is also lightweight, and doesn’t put any overhead on your computer hardware.
Shanoon Cox
Shanoon Cox is a writer and a lover of all things video.
Follow @Shanoon Cox
Also read:
- [New] Download All YouTube Images for Free!
- [New] EchoHarvest App Reviews Step-by-Step Guide for 2024
- [New] The Art of Crafting a One-of-a-Kind TikTok Marker
- [New] Transform Your Video Content Using Story Remix on Windows Photos
- [Updated] Entering a Friend's TikTok Live A Step-by-Step Guide
- [Updated] In 2024, Beam Into a TikTok Live Your Seamless Integration Techniques
- [Updated] In 2024, Ethical and Safe TikTok Following Hacks
- 2024 Approved Pro-Level Snap Tech Free From Any Delaying Hiccups
- 2024 Approved QuickScreenRecorder Easy Captures, Anytime
- How to Upgrade Apple iPhone 14 Pro without iTunes? | Dr.fone
- In 2024, Android Unlock Code Sim Unlock Your Google Pixel 7a Phone and Remove Locked Screen
- In 2024, How to Unlock iPhone 13 mini with a Mask On | Dr.fone
- In 2024, Pokémon Go Cooldown Chart On Vivo Y55s 5G (2023) | Dr.fone
- In 2024, Unlocking the Door to Joining a TikTok Gathering
- Mistakenly Cleared TikTok Videos What to Do Next for 2024
- Stepping Into the Spotlight Joining TikTok Sessions for 2024
- Title: [New] Piecing Together an Epic TikTok Conclusion for 2024
- Author: Brian
- Created at : 2024-10-17 17:28:47
- Updated at : 2024-10-18 16:17:29
- Link: https://tiktok-videos.techidaily.com/new-piecing-together-an-epic-tiktok-conclusion-for-2024/
- License: This work is licensed under CC BY-NC-SA 4.0.